6 Carrot Gold
April 29, 2012 § Leave a comment
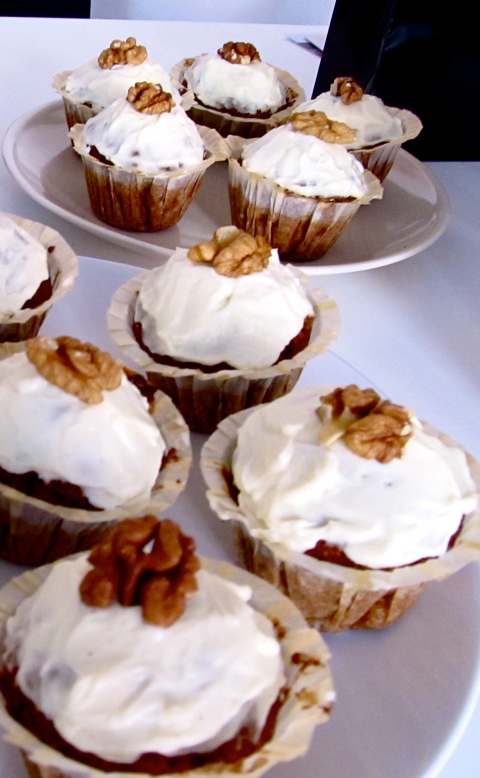
Friday there was a birthday here in the apartment. Our roommate turned 19 so I decided she needed copious amounts of cake. I suck at making cakes. They don’t rise. They taste bland. They’re dry. Over cooked. Undercooked. You name it, I would have done it wrong in a cake. But Ane (roommate) loves Carrot CAKE. So on to the net I hoped in the hope of finding a Carrot cup CAKE recipe. See, cake is still there, just more foolproof in a cupcake. This is the one I used care of BBC Good Food.
Carrot Cupcakes with Cream Cheese Icing
175g brown sugar
100g wholemeal flour
100g self-raising flour
1 tsp baking soda
2 tsp mixed spice ( I may have used a tad more – I didn’t measure)
zest of one orange
juice of one orange (As suggested by others. Definitely needed it. Would have been too dry without it)
2 eggs
150ml sunflower oil (I used rapeseed oil. Any vegetable oil usually works just not olive as it’s too strong)
200g carrot (About 6 medium-sized carrots)
Icing (I adjusted the recipe since I had less cream cheese)
40g butter, softened
200g cream cheese (I tried using the light stuff and it turned out really runny. I recommend using the normal stuff)
1 tsp vanilla extract/essence/vanilla sugar
enough icing sugar to get a good taste
- Mix the dry ingredient and zest in a bowl.
- In another bowl, mix the eggs, juice, oil and carrot.
- Add wet ingredient to the dry and mix until just combined. Don’t over mix.
- Spoon in to cup cake moulds/cases/forms/whatever you use.
- Bake for 20-22 min or until they spring back when touched.
- Use an electric beater to make the icing. Just chuck all the ingredients together. Allow the cupcake to cool before icing. Experience has taught me impatience and baking aren’t such a good combo. Make sure you find yourself something to do for an hour or so so you won’t fidget with the muffins and/or the icing every two minutes.
Enjoy!
Colette Spring/Summer Palette Challenge and Birthday Wishes
April 25, 2012 § 1 Comment
My birthday is coming up soon, June to be precise, and since posting things from New Zealand to Denmark can be a bit of a process, my mum has asked me to give her a list now. Knowing that Mum HATES giving gift vouchers with an undeniable passion, I have been spurred to figure out what exactly she can send me. Clothes never seem to fit right when I order them online and lets just say our tastes in fabric are also quite different, so I moved on to patterns. Living on a tight budget and trying to sew in Denmark, are things that don’t go together so well and the Burdastyle magazines at the library have been getting quite a work out but it’s also nice to have your own personal patterns.

I have also been hearing about the Palette Challenge over at the Coletterie for spring/summer 2012. I’m hoping that it will spur my procrastination in to action and I will be more focused on sewing rather than fluffing around. I’m already half way through one project I had planned for summer so I guess that will be a start. I would love to own that red dress from Modcloth so that will definitely be on the sewing list for this summer.
After much fussing around I settled on wishing for these sewing related things:
 Fit for Real People – from the way everyone praises it, it seems like its a womanly curved woman’s dream to turn even the sack-iest sack in to a perfect fit
I’m a sucker for sewing books with patterns

Well if you INSIST that it’s essential…
From top left Colette Macaron, Megan Nielsen Darling Ranges, New Look 6824, Burdastyle 7295, New Look 6968
As you can see from the patterns I have chosen, they are quite fitted. I want to be able to wear a dress that doesn’t look like it’s 1 size too small in one area and 2 sizes too big in others. My goal for this year is to perfectly fit something. I love fitted dresses so I thought that would be a good place to start. The Macaron and Darling Ranges are mostly because everyone else’s versions looked so good! Just pure jealousy, folks!
Til next time!
To the Maxi
April 15, 2012 § 1 Comment
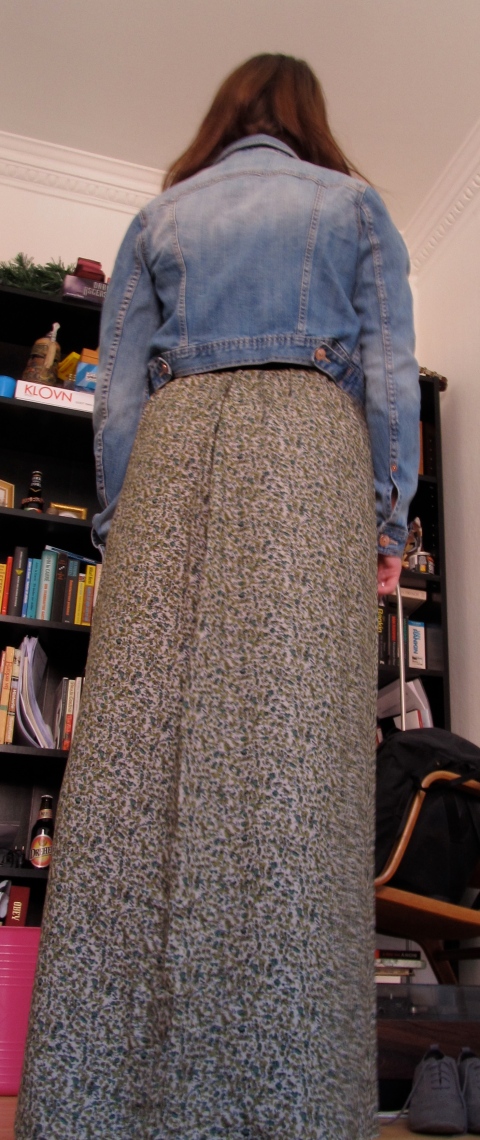
I’m someone who has taken a bit of time to jump on the maxi bandwagon. At the start it was because I didn’t like the whole long skirt thing since all of my dresses and skirts are above the knee. After I began to consider my shape a little more, I thought the length would make me look short. But I have bitten the figurative maxi bullet and made a very simple one with an elasticated waist. It took all of an hour to make, after hours more of fluffing around and procrastinating about what type to make of course, but what sort of procrastinator would I be if I made things with out fluffing around first?
I had some cotton viscose on hand in a green floral which I thought would go perfectly with my new denim jacket, mentioned here, which I caved and bought from H&M. The soft and cool feel of the fabric will also be great for summer. I used 5cm wide elastic for the top band and around 1.10m of fabric.
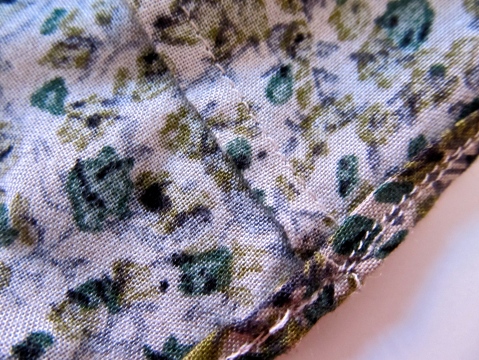
Since I don’t like zigzagging and this fabric frays A LOT, all the seams are french seams and the hem is a rolled hem. I’m really beginning to like these two techniques as they give such a clean finish. No stray threads hanging around the place and no need to buy an overlocker!
I don’t like too much gathering around the waist as it just makes me look like I have a pot belly and like my hips have a mind of their own, which a lot of the time they do, but there is no need to encourage them. Instead of using the waist measurement for the waist of the skirt, I used the one for my hips + ease so I would be able to pull the skirt on and off with the elasticated waist. I had seen a lot of other posts where the waist measurement was doubled to have the gathered look but I think that would have been far too much and I’m glad I did it this way.
Next on the agenda is making basic blocks, which I have been inspired to do by Liz over at agoodwardrobe with her post on her skirt sloper as well as her links to drawing a basic bodice block. I think having something to fit off that I know fits me well, will be really helpful in the long run.
Til next time.
Little Red Raspberries
April 4, 2012 § Leave a comment
Chocolate self-saucing pudding is a favourite in our house apartment, especially over the LONG, drawn out winter that has crept back in to our lives again after a month of glorious, warmer weather. Normally, I can’t eat to much of the rich sweetness that is the “self-saucing” part, without getting a stomach ache, but last night I may just have solved this. I had some raspberries in the freezer just waiting to be used for something so I decided to give them a whirl in this. The fresh, slightly sour, taste of the raspberries counteracted the rich sweetness of the sauce nicely. Unfortunately, I was to excited too try it out before I realised I hadn’t taken a picture, so the one above is from google, but I promise to get one the next time I make it (don’t worry, you won’t be waiting long!). All I did was stir half a cup of raspberries in to my normal recipe and voila! Fancy pants self-saucing pudding.
Side note: Upon looking for pictures like the one above, I found this is not a new idea and I’m just too slow to click on to the amazing-ness that raspberries are. Duh, Amelia!
Chocolate and Raspberry Self-Saucing Pudding
From here but I’ve seen the same recipe in a few different recipe books.
Cake mix
1 cup/150g self-raising flour
2 Tbsp/15g cocoa powder
3/4 cup/180g sugar ( I add less than this most of the time since it is really sweet with the sauce. Closer to 1/2 cup)
pinch salt
1 cup/250mL milk
2 Tbsp/40mL vegetable oil
1 or 2 tsp/5 or 10mL vanilla essence
1/2 cup/75g raspberries
Sauce
3/4 cup/150g brown sugar (Again, I use a little less normally)
1/4 cup/30g cocoa powder
2 cups/500ml hot water
Method
Sift dry ingredients together
Make a well in the centre and add milk, oil and vanilla
Mix until combined
Stir in raspberries
Pour mixture in to an oven proof dish (with higher sides. The liquid will rise)
In a separate bowl, sift cocoa and brown sugar together
Pour in boiled/hot water
Mix until the cocoa and sugar have dissolved and there are no lumps
Pour the liquid over the back of a spoon on to the cake mixture (don’t worry if it looks like too much liquid)
Bake at 180 degrees for 45/50 m
Enjoy and in the words of my mother, “Don’t make yourself sick on that!”.


